Wednesday, February 19, 2014

Stacked Coins


I went to the recent sew day in my new community; they make kids quilts to donate to Child Protection Services.


Three afternoons of sewing and I have a top. That's a new record for me. I used strips from my 2 1/2" bin, so there wasn't a lot of cutting to do.

Thursday, February 13, 2014

Reclaimed Sweater Mitts


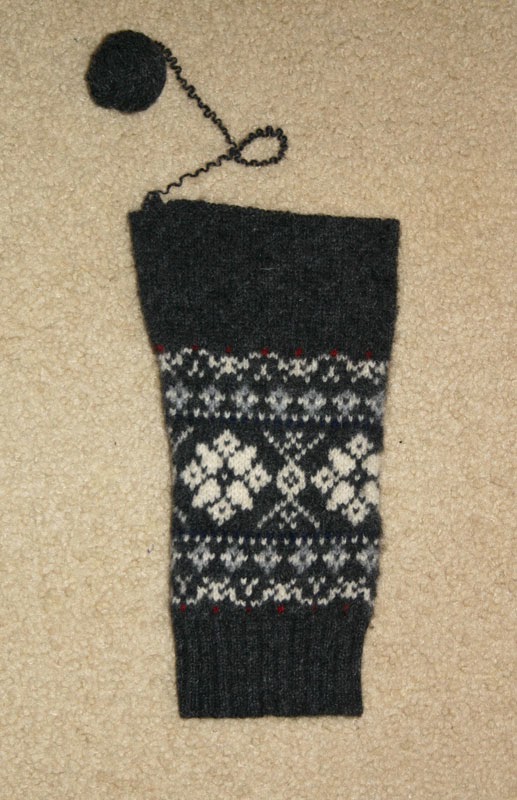
What do you do if you want Shetland Fair Isle fingerless mitts but your stranded knitting skills aren't quite there yet? You can make a pair from the sleeves of a reclaimed sweater.


I got this Abercrombie and Fitch sweater from e-bay for less then five dollars. I think it's because it had shrunk when washed and the sleeves were much too long for the rest of the garment.


I tried on the sleeve to determine the length of the mitt and cut it off two inches higher. Then I unraveled two inches of what was to become the top of the mitt.


Next I took it to the sewing machine and shaped the arm. I trimmed the extra to a quarter-of-an-inch. The Shetland wool is sticky so I didn't worry about the ends raveling. Then I sewed a notch in the bottom ribbing to create the thumb opening. Once the sewing was done, I picked up the live stitches on dpn's and using the reclaimed yarn from the sleeve, knit ribbing to match the cuff.


I love 'em! Soft, warm, quick and looking like I know how to do stranded colorwork.

Sunday, February 09, 2014

Notions Bag


As a break from knitting, I worked on my Sashiko. Then I made it into a little zippered notions bag.


One square of fabric for the back, two for lining and a matching zipper.


Inserted the zipper.
 

Layered right sides together and sewed with a quarter inch, leaving an opening to turn.


The zipper was closed when I sewed the front and back together, but I needed it open to be able to pull the lining through to the bag and then the wrong side of the bag to the right side. It was sort of like working inside a double pocket!


I like to use a pointed chop stick to help gently poke out the corners.


A light pressing and away you go.

Saturday, February 08, 2014

Sewing Room


New Design Wall


Once I moved into the sewing room, it was time to create the design wall. 6' x 7'. Yeah!
 

We started with sheets of foam insulation, duct tape, prepainted wood trim and 72' wide felt by the yard.


We used a craft spray adhesive, not spray baste which is designed to wash out.


After the batting was affixed to the board, I trimmed it to an inch all around.


Then my husband framed it with wood strips. We tucked the batting under the wood as it was screwed in place.


Now that's a helpful tool for laying out my Ocean Wave! I thought the duct tape showing through would bother me, but it can act as grid lines for placement.